Boktai 2: Any% Route
About this guide
This guide assumes you are playing on the Japanese 1.0 release of Boktai 2.
It will likely work fine for other releases but some strategies like RNG manipulation will need different timings.
Directions for paths and exits will use ↖️, ↗️, ↙️ and ↘️.
Terminology
- RNG manip
- Short for “Random Number Generator Manipulation”. Used to influence the randomness within the game to make things happen that are normally reliant on chance.
- Soft reset
- Pressing A + B + Start & Select at the same time reboots the game. This is useful for RNG manip and can be used to skip dragging coffins back to town.
- STRG and AGIL
- Strength and Agility. The third and fourth status point options. They influence your physical damage, movement speed and defense.
Exp table
Tip
Click to open
Imported from this spreadsheet.
Before starting
Make sure you have an existing save file and that the Crossover option is unlocked in the Link menu.
To unlock the Crossover option, go to the Link menu, then press the following buttons in order:L R L R L L R R R R L L Select Start Select Start.
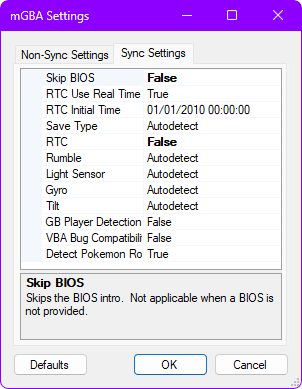
Emulator settings
- Requires BizHawk 2.6.3 or newer.
- Set “Skip BIOS” and “RTC” to False in the GBA Settings.
Setting “Skip BIOS” is mandatory as this creates parity with actual hardware.
Disabling RTC simulates an empty cartridge battery which enables some of the strats in this guide.
Initial Game Settings
Ensure that no UV is reaching the solar sensor before confirming calibration settings (Not relevant for emulator play):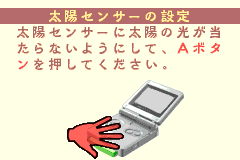
Set the system time to August 1st 2004 at 11:55PM (2004/08/01 23:55):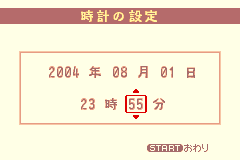
Use the default region selection.
Select New Game and enter the password for the “Dark Boy” title.
This title grants +2 STRG, +2 AGIL, a ![]() Power Nut and a
Power Nut and a ![]() Bearnut.
Bearnut.
Use the characters to the left of the numbers:
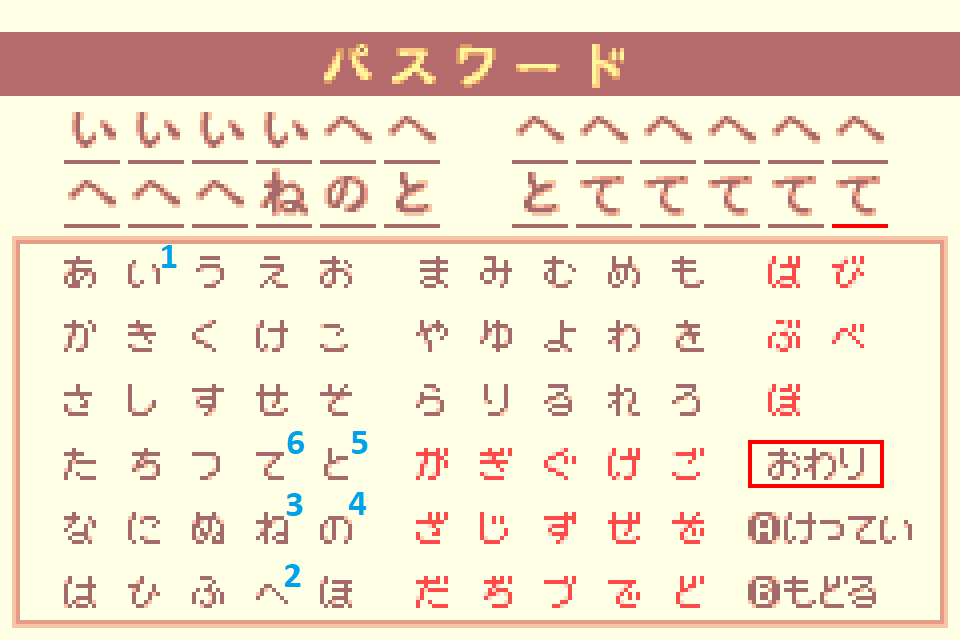
Use a single character for the player name. This saves a few frames each time the name is typed out in cutscenes.
Timing starts when confirming your settings.
Tutorial
After the intro, progress through the linear route until you run into the trap.
Skeleton Trap
- Proceed through the ↘️ exit to obtain the
 Gladius.
 - Backtrack and hit the Skeleton from behind to reach Lvl 2.
Proceed through the ↖️ exit, then through the ↗️ exit twice.
Zombie Trap
- Hit the Zombie 3 times to trigger the cutscene.
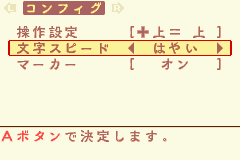
- Open the menu and change the text speed to Fast:
- Unequip your current armor (less defense, faster walking speed).
- Hit the Zombie from the front twice.
San Miguel
After the dialogs, kill the first Ghoul for EXP then proceed through the ↗️ exit.
At the piledriver screen, proceed through the ↖️ exit.
Proceed towards the ↗️ exit, kill the Ghoul for EXP, enter the Cathedral.
Cathedral
Kill two Ghouls to reach Lvl 3, raise AGIL to 17 and put your remaining stat point into STRG.
Push the blocks to progress and proceed through the ↗️ exit.
After the cutscene, proceed through the ↘️ exit.
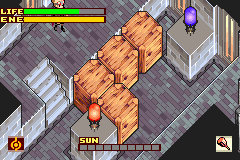
Block Puzzle
Open the chest for a ![]() Club.
Club.
Backtrack, kill the Ghoul in the previous room for EXP.
Destroy the first wooden block to push the 2 stone blocks, also open the chest for a ![]() Power Nut.
Power Nut.
Ensure that you push the stone block into the hole in the floor, otherwise this room will be unsolved later on.
Proceed through the ↘️ exit by destroying the wooden block.
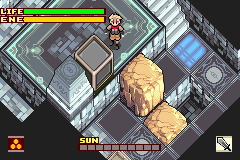
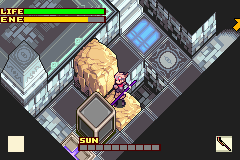
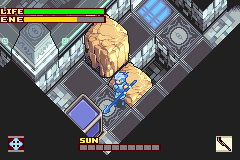
Graveyard & Basement Puzzles
Proceed straight ahead to enter the Graveyard.
- 1st row: Push the 2nd tombstone
- 2nd row: Push 1st
- 3rd row: Push 2nd
Backtrack and take the stairs into the basement.
Kill all Ghouls until you reach the 5th room. You should now be Lvl 4.
In the 5th room, knock on the wall near the center of the room, then run along the right outside wall to avoid the Zombie.
In the remaining basement rooms, use ![]() Flame with
Flame with ![]() Sword to light torches and
Sword to light torches and ![]() Club to activate levers.
Club to activate levers.
Push the blocks as shown here, then touch the lamp:
After leaving the basement, put all stat points into STRG.
Skeletons Trap
- Use
 Sol and hit the Skeletons from behind.
 - You should reach Lvl 5 after this fight.
Put all stat points into STRG.
Open the chest for the ![]() Yellow Orb and proceed through the bottom ↖️ exit.
Yellow Orb and proceed through the bottom ↖️ exit.
Knock on the central wall to lure the Ghoul, then open the chest for a ![]() Warp Leaf and proceed.
Warp Leaf and proceed.
Break and move the wooden blocks to get the ![]() key, then light the torch and place the
key, then light the torch and place the ![]() Yellow Orb.
Yellow Orb.
Refill life if under 50% and refill energy to at least 80% before leaving the room.
Backtrack to the trap room and kill a Ghoul, then proceed through the top ↘️ exit.
The ![]() Red Orb will be in a random skylight.
Red Orb will be in a random skylight.
Check the spot directly next to the stairs, then take the stairs whether or not you found it.
Ghouls + Zombie Trap & Short Sword RNG Manip
- Follow the RNG manip method in the below video to get a
 Short Sword:
Proceed through the ↖️ exit and fall down to get the ![]() Short Spear.
Short Spear.
Kill two Ghouls, then backtrack to this room:
Use the spear on the lever to open the gate and proceed up the stairs.
Light the first torch with ![]() Flame and place the
Flame and place the ![]() Red Orb if you already found it, otherwise continue upstairs.
Red Orb if you already found it, otherwise continue upstairs.
Hold left upon entering the top floor to trigger the trapdoor and light the torch with hammer and ![]() Flame to set up the timing to walk over the trapdoor.
Flame to set up the timing to walk over the trapdoor.
Talk to the hint panel in the bottom-left corner (necessary for a puzzle).
Drop through a trapdoor and backtrack to the Red Orb room.
If you did not already get the ![]() Red Orb, check all of the skylights whilst moving through the room, then light the torch with spear and
Red Orb, check all of the skylights whilst moving through the room, then light the torch with spear and ![]() Flame.
Flame.
Proceed down the new stairs and go outside.
Once outside, destroy the 2 statues with spear and ![]() Sol to obtain the
Sol to obtain the ![]() Blue Orb.
Blue Orb.
Open the orange chest in that area for a ![]() Warp Leaf.
Warp Leaf.
Backtrack to the Red Orb room.
If you did not already find the ![]() Red Orb, do not proceed before finding it.
Red Orb, do not proceed before finding it.
Backtrack to where you obtained the spear, but instead of falling, proceed through the ↖️ exit.
Library Puzzle
Talk to these bookshelves to open the gate:
Lamp Puzzle
Open the first chests on the left for a ![]() Power Nut and a
Power Nut and a ![]() key.
key.
Green Orb Puzzle
Light the torches with spear and ![]() Flame, then push the first block to reach the second one.
Flame, then push the first block to reach the second one.
Push the second block onto the weight switch to activate the lamp.
Interact with the lamp to obtain the ![]() Green Orb.
Green Orb.
Backtrack to the main room and kill two Ghouls to reach Lvl 6.
Backtrack to the room with the trapdoors and hint panel.
Place the ![]() Red Orb before going to the top floor if you did not already place it.
Red Orb before going to the top floor if you did not already place it.
Place the ![]() Green Orb (2nd option):
Green Orb (2nd option):
Proceed through the ↖️ exit (Refill life on skylights if low).
Light the torch with ![]() Flame and place the
Flame and place the ![]() Blue Orb.
Blue Orb.
Backtrack and proceed down the new stairs in the main room, refill energy on the Solar Station.
Equip the ![]() Short Sword, then put all stat points into STRG.
Short Sword, then put all stat points into STRG.
White Duneyrr
- Light the torch in the center with spear and
 Flame. With precise positioning you can hit all four candles with one attack.
 - Line up directly behind Duneyrr and use the Short Sword and Sol to attack Duneyrr twice per cycle.
- After she flinches, move onto her position, then switch back to spear and Flame to hit the torch in the center again.
- Repeat until the fight is over, if executed correctly your energy will last until the end of the fight and Duneyrr will never be able to act.
- You should reach Lvl 7 after this fight.
Proceed through the ↗️ exit to trigger a cutscene.
Ignore the chest and exit the room.
After picking up the coffin, put all stat points into STRG and use a ![]() Power Nut.
Power Nut.
Proceed through the top ↖️ exit in the main room.
Activate the 3 weight switches by using the coffin and pushing the block.
Proceed through the middle ↖️ exit and open the blue chest (![]() key) and the chest to the left (
key) and the chest to the left (![]() Power Nut).
Power Nut).
Use a second ![]() Power Nut when your buff expires.
Power Nut when your buff expires.
Drag the coffin back to town and into the piledriver screen.
White Duneyrr Purification
Enable max sunlight for purifications, you cannot start a purification sequence without sunlight enabled.
- Activate three generators and leave the fourth inactive until after you’ve started the purification to skip a long dialog.
- Stand east-southeast of the coffin and aim to knock her back in as soon as she escapes.
- Her first attack begins directly after this, do not stand in it as you will die quickly.
After the purification, choose the first dialog.
San Miguel (2)
Talk to Smith near the forging house, then proceed through the ↘️ exit and enter the Remains.
Remains
In the main room with Clay Golems, proceed through the ↖️ exit, then take the stairs.
Vampire Bats Trap
- If no armor is equipped, be careful as you will die in 2 hits.
- Try to group them up and use Sol.
Use no element to kill the Yellow Slimes, they have high elemental resistances.
Refill health on the Yellow Slime corpses as they die, so that you can pick up a ![]() Power Nut if one drops.
Power Nut if one drops.
Go ↖️ to push a block, then leave the room.
REFILL LIFE AND TURN OFF SUNLIGHT before proceeding through the ↗️ exit; Solar Wind will kill you if sunlight is enabled, and you want to damage-boost through the flame jets which requires >70% life.
Damage-boost through the flame jet, then stand on the floating platform and light the torch with ![]() Flame to proceed.
Flame to proceed.
Light the second torch as the two floating platforms intersect, then wait for the second flame jet to fire before proceeding.
During the dialog, choose the first option.
Backtrack through the solar wind room, damage-boost through the last flame jet.
Refill life before proceeding down the stairs.
Extinguish the flame with ![]() Frost to proceed.
Frost to proceed.
Push the block, then proceed through the ↖️ exit.
Use ![]() Flame to melt the blocks.
Flame to melt the blocks.
If you did not get a random ![]() Power Nut drop from the Yellow Slimes, open the top chest for a
Power Nut drop from the Yellow Slimes, open the top chest for a ![]() Power Nut.
Power Nut.
Use ![]() Frost to make the floating block fall, then refill life/energy to 100% on the skylight.
Frost to make the floating block fall, then refill life/energy to 100% on the skylight.
Sword, Yellow Slimes, Clay Golems Traps
- Sword: Use Sol to deal more damage.
- Attack 10 times before dodging out of the way of its thrust, then attack 11 more times before it teleports. Finish it off after the teleport.
- You should reach Lvl 8 after this fight.
- Yellow Slimes: Attack without using any element.
- Clay Golems: Knock on the walls so that they stun each other, then finish them off.
- With a +0 Short Sword, each set of Clay Golems will need 3 hits with Sol plus 1 additional unenchanted hit to kill quickly.
- If any Clay Golems kill each other, you must kill extras later to make up the lost EXP.
- You should reach Lvl 9 after this fight.
- With a +0 Short Sword, each set of Clay Golems will need 3 hits with
Open the blue chest for a ![]() key, then proceed through the ↘️ exit and open the door.
key, then proceed through the ↘️ exit and open the door.
During the dialog, choose the second choice, then proceed up the stairs in the next room.
Kill the Vampire Bat and proceed.
Refill energy to 100% before taking the ↗️ exit to go back indoors.
2-Colour Puzzle
Put all stat points into STRG and use a ![]() Power Nut.
Power Nut.
Push one block towards the start of the room like this:
After that, push the other block on its spot, then do the same with the first block: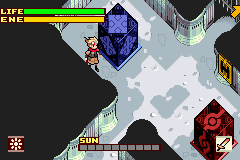
In the next room, push the floating block with sword and ![]() Cloud ↘️, then spear ↗️, then lower it with
Cloud ↘️, then spear ↗️, then lower it with ![]() Frost.
Frost.
In the newly-unlocked room, destroy the stone block with ![]() Cloud to get the
Cloud to get the ![]() key.
key.
Backtrack to the previous room and push the block on the left, proceed through the ↖️ exit.
Break the stone block on the way with ![]() Cloud, then select
Cloud, then select ![]() Sol.
Sol.
Open the door and kill the Yellow Slime with unenchanted hits.
Do a short energy refill on the Yellow Slime corpses as they die, so that you can pick up a ![]() Power Nut if one drops.
Power Nut if one drops.
Proceed through the ↘️ exit and push the block.
Backtrack outside and take the stairs, then proceed through the ↘️ exit.
In the room with skulls, make sure that you have no sunlight (deactivates traps).
Open the chest on the left (bottom) for a ![]() Speed Nut, then proceed through the ↗️ exit.
Speed Nut, then proceed through the ↗️ exit.
4-Colour Puzzle
Use a ![]() Power Nut, then push the blocks like this (start with the
Power Nut, then push the blocks like this (start with the ![]() Flame block):
Flame block):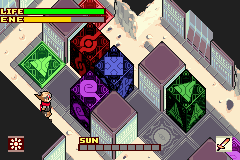
Kill the two Mummies with ![]() Sol and proceed up the stairs.
Sol and proceed up the stairs.
Proceed to the bottom of the next room, then kill the Clay Golem with ![]() Cloud before taking the ↖️ exit.
Cloud before taking the ↖️ exit.
Proceed through the immediate ↙️ exit.
In the room with the flame jet, use ![]() Flame on the Mummy to activate the torch, then proceed up the stairs.
Flame on the Mummy to activate the torch, then proceed up the stairs.
Avoid the Yellow Slimes and open the blue chest for a ![]() key.
key.
Refill life/energy before going back indoors, then proceed through the ↙️ exit.
Push the block and proceed through the ↘️ exit.
Open the ↗️ door and proceed.
Axe Trap
- It’s an axe!!
- Use a single unenchanted hit, then Sol hits to deal more damage.
- Try not to miss any Sol hits as energy is strictly routed here.
- You should reach Lvl 10 after this fight.
Open all the chests for a ![]() key, the
key, the ![]() Dynamite magic, and a
Dynamite magic, and a ![]() card.
card.
Use a ![]() Solar Nut.
Solar Nut.
Backtrack to the first room by proceeding through the ↙️ exits.
Kill all four Clay Golems with ![]() Cloud and proceed through the ↘️ exit.
Cloud and proceed through the ↘️ exit.
Kill both Clay Golems with ![]() Cloud and proceed in the same direction.
Cloud and proceed in the same direction.
You should now be Lvl 11.
Open this hidden chest for a ![]() Warp Leaf, then open the door:
Warp Leaf, then open the door:
Skip getting water from the fountain, then proceed.
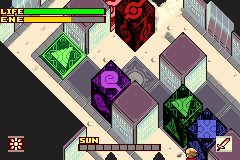
Desert Puzzle
You must now find three ![]() Stone Tablets that are in fixed spots on eight screens:
Stone Tablets that are in fixed spots on eight screens:れたオアシスの下 / Beneath a dried-up oasis")


ちたゴーレムの修ろ / Behind a crumbling golem")


Begin on the southwest screen (first image) and proceed counter-clockwise.
On the south screen (second image) kill a Clay Golem with ![]() Cloud.
Cloud.
If you already have two ![]() Stone Tablets by this point, proceed ↗️ to the central screen and interact with the statue to check where the remaining tablet is.
Stone Tablets by this point, proceed ↗️ to the central screen and interact with the statue to check where the remaining tablet is.
When you have all three tablets, proceed to the central screen and talk to the statue: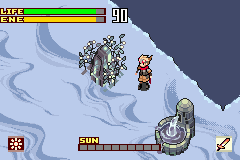
Refill energy to 100% before proceeding into Remains B.
If you do not currently have two ![]() Power Nuts in the inventory, open this hidden chest:
Power Nuts in the inventory, open this hidden chest:
Torch Puzzle
Light the torches in this order: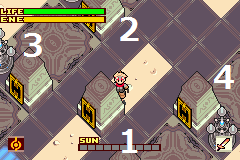
Proceed downstairs, kill the Clay Golem with ![]() Cloud and the Mummies with
Cloud and the Mummies with ![]() Sol.
Sol.
Proceed through the ↙️ exit.
Start with the puzzle room on the top-right:
Select spear and ![]() Cloud.
Cloud.
Push the first block ↘️.
Push the second block ↘️ onto the weight switch.
Push the first block ↖️↗️↖️ onto the other switch, then use ![]() Frost on both blocks.
Frost on both blocks.
Proceed to the puzzle room on the top-left:
Refill energy to 100% on the Solar Station.
Use ![]() Flame on the block, then spear and
Flame on the block, then spear and ![]() Cloud to push it ↖️.
Cloud to push it ↖️.
Use your ![]() Speed Nut.
Speed Nut.
Use spear and ![]() Cloud to push the block ↙️.
Cloud to push the block ↙️.
Open this hidden chest for a ![]() Warp Leaf:
Warp Leaf:
Refill energy to 100% on the Solar Station before leaving the room.
Proceed to the puzzle room on the bottom-left:
Activate all of the floor switches, then hit the lever with the spear.
Equip sword and ![]() Sol before leaving the room.
Sol before leaving the room.
Proceed to the final puzzle room on the bottom-right:
Activate the first lever with the sword, then run ↙️.
When you’re close enough, run ↗️ onto the switch.
Do not assign stat points before the boss fight.
- 31 STRG (33 Attack) is enough for the fight, you want to save these stat points for later.
Vampire
- Stay away so that Sabata doesn’t get hit.
- Position yourself so that the swords don’t go in Sabata’s direction.
- Only hit the Vampire when the black hole is active.
- Face in the same direction as the Vampire to push him into the black hole faster.
- When the Vampire is stuck in the black hole, use Sol.
- Follow the specific damage route shown in the below video to avoid a third cycle:
- You should reach Lvl 12 after this fight.
Once you gain control of Sabata, pick up the coffin and leave the room through the ↙️ exit.
Take two full steps, then use a ![]() Power Nut to drag the coffin back to San Miguel.
Power Nut to drag the coffin back to San Miguel.
Use a second ![]() Power Nut when your buff expires.
Power Nut when your buff expires.
Django Purification
Enable max sunlight, activate the bottom two generators and begin the purification.
![]() Zero Shift onto the coffin after gaining control of Sabata and activate the other two generators.
Zero Shift onto the coffin after gaining control of Sabata and activate the other two generators.
Position Sabata to the south of the coffin to manipulate Django to move upwards.
![]() Zero Shift upwards and knock him back into the coffin from the north.
Zero Shift upwards and knock him back into the coffin from the north.
Move just north of the coffin and wait for Django to attack one of the generators.![]() Zero Shift in the appropriate direction and shoot Django back into the coffin.
Zero Shift in the appropriate direction and shoot Django back into the coffin.
- If Django goes to a northern generator, shoot diagonally to push him back into the coffin.
- If Django goes to a southern generator, shoot horizontally to push him back into the coffin.
San Miguel (3)
Unequip ![]() Cloud.
Cloud.
Equip ![]() Dark over
Dark over ![]() Sol,
Sol, ![]() Bat over
Bat over ![]() Frost and
Frost and ![]() Mouse over
Mouse over ![]() Flame.
Flame.
Raise AGIL to 25, and put your remaining stat point into STRG.
Visit the coffin shop in the southwest corner of town and buy the ![]() Elefan coffin (160 solls).
Elefan coffin (160 solls).
Refill energy to 100%, attempt to summon moonbugs before starting the energy charge to offset the damage Black Django takes from sunlight.
Proceed to the piledriver screen.
Kill the two Dark Roots on the right with spear and ![]() Dark, then leave through the way you came in.
Dark, then leave through the way you came in.
Keep re-entering the piledriver screen and kill thirty (30) more Dark Roots this way.
You will need to refill energy during this grind, summon moonbugs before the energy refill to once again offset the sunlight damage.
You should reach Lvl 15 during this grind.
Proceed through the ↘️ exit and break the two blocks to the south.
Kill the southern Dark Root with spear and ![]() Dark, then proceed through the furthest ↗️ exit.
Dark, then proceed through the furthest ↗️ exit.
Dark City
Put all stat points into STRG.
Open the first chest for a ![]() Sunscreen.
Sunscreen.
In the next room, kill the Bandit with sword and ![]() Dark, then proceed through the ↗️ exit.
Dark, then proceed through the ↗️ exit.
Go around and proceed through the ↘️ narrow passage.
Proceed through the ↙️ exit, then the last exit at the bottom.
Kill the Bandit with sword and ![]() Dark, then proceed through the ↗️ exit, then again in the same direction.
Dark, then proceed through the ↗️ exit, then again in the same direction.
In the room with the Zombies, proceed through the ↖️ exit.
After the cutscene, refill energy (Summon moonbugs before starting energy charge to offset sunlight damage).
Proceed through the ↖️ exit.
Proceed through the second door, then use ![]() Mouse to proceed through the mousehole.
Mouse to proceed through the mousehole.
Use hammer to activate the lever, then take the stairs.
Kill both Green Slimes with sword for EXP.
Proceed through the ↙️ exit, then take the stairs.
Use ![]() Bat to go through the window, then take the first exit.
Bat to go through the window, then take the first exit.
Un-transform immediately and proceed through the ↙️ exit.
Use ![]() Mouse before getting on the elevator, then proceed through the ↗️ mousehole.
Mouse before getting on the elevator, then proceed through the ↗️ mousehole.
Kill the Green Slime for EXP, then proceed through the ↘️ exit and push the block.
Push the Green Slime out of your path, then use ![]() Mouse to go back through the mousehole.
Mouse to go back through the mousehole.
Take the elevator without being shapeshifted, then proceed through the ↘️ exit.
Use ![]() Bat to fly over the water and proceed through the ↖️ door.
Bat to fly over the water and proceed through the ↖️ door.
Open the blue chest for a ![]() key, then leave the room.
key, then leave the room.
Backtrack and proceed through the ↘️ exit, then through the first ↗️ door.
Proceed upstairs, kill both Green Slimes with sword and open the locked ↘️ door.
You should now be Lvl 16.
Kill the two Gusts with sword for EXP, then proceed down the ↙️ stairs.
Once outside, proceed through the ↖️ exit nearby.
Use ![]() Bat to go over the water, then proceed through the ↗️ door.
Bat to go over the water, then proceed through the ↗️ door.
Use ![]() Bat before getting on the elevator, then proceed through the ↖️ window.
Bat before getting on the elevator, then proceed through the ↖️ window.
Take the first exit, then go downstairs and through the ↘️ door to push a block.
Backtrack inside but do not take the stairs, instead use ![]() Bat to fly over the narrow path and proceed through the ↙️ exit.
Bat to fly over the narrow path and proceed through the ↙️ exit.
Use ![]() Bat to fly over the water and switch trap, then open the chest for a
Bat to fly over the water and switch trap, then open the chest for a ![]() key.
key.
Proceed through the ↘️ exit, push the block and go through the second ↗️ door.
Unlock the next ↗️ door, then use ![]() Bat to fly over the narrow paths.
Bat to fly over the narrow paths.
Avoid the ghosts and use ![]() Bat to proceed through the ↘️ window.
Bat to proceed through the ↘️ window.
Go left and proceed through the last exit.
Un-transform immediately, then hug the left wall to go behind the Gust.
Knock on the wall after passing the first corner to distract the second Gust, then hug the left wall and knock on the wall inside the skylight to cluster all three.
Open the blue chest for a ![]() key.
key.
When all of the Gusts are in the skylight, enable 9 sunlight to deal 270 damage to them, then immediately disable sunlight before using sword to finish them off.
Use ![]() Bat to proceed through the ↖️ window.
Bat to proceed through the ↖️ window.
If you accidentally killed the Gusts with sunlight or they killed each other by detonating, you can farm the Green Slime through the ↗️ exit to make up the missing EXP.
Proceed through the first exit, then go downstairs and through the ↘️ door to push another block.
Backtrack and take the elevator, proceed through the ↙️ exit, then go ↘️ and ↗️ to unlock the next door.
Refill energy on the Solar Station and put all stat points into STRG before taking the elevator.
Select the first option during the dialog.
Cheyenne
- Use
 Dark, keep hitting him non-stop.
 - Try to aim in the correct direction so that hits counts as back hits for higher damage.
- Try to cause him to flinch as he pulls out new weapons to keep him disarmed.
- When he attempts to use an item to heal/buff himself, attack him to force him to drop it.
Refill energy whilst waiting for the elevator to leave the room.
Use the warp circle, then use a ![]() Warp Leaf to leave the dungeon.
Warp Leaf to leave the dungeon.
Proceed through the ↙️ and ↖️ exits to backtrack to San Miguel.
Talk to Cheyenne to unlock the weapon shop.
Buy two ![]() Broadswords and equip the
Broadswords and equip the ![]() Gladius.
Gladius.
Place the two ![]() Broadswords in the first two inventory slots, and your
Broadswords in the first two inventory slots, and your ![]() Short Sword in the third slot.
Short Sword in the third slot.
Go to the forging house and forge a ![]() Long Sword using the second
Long Sword using the second ![]() Broadsword +
Broadsword + ![]() Short Sword.
Short Sword.
Katana Manip
Exit and re-enter the forging house.
Save and soft-reset (A+B+Start+Select).
From soft-reset, RNG advances every frame. Use an external timer like EonTimer to assist in the manipulation.
Set the system time to 2004/05/05 23:56.
Talk to Smith and begin selecting your weapons to forge with.
Select the ![]() Broadsword and
Broadsword and ![]() Long Sword in the first two slots.
Long Sword in the first two slots.
Start the forge at these precise times after soft-reset has taken place, for the respective platforms:
- Emulator: 34.07~ seconds
- Nintendo DS: 34.30~ seconds
- Game Boy Player: 34.23~ seconds
Do precisely 15 strikes in this forge.
Get at least two GREATs to guarantee an SP weapon.
If every hit is a GREAT, you will increase the frame window from 8 to 12.
If the start of forge was timed correctly, the resulting weapon will become a ![]() Katana SP.
Katana SP.
Backtrack through the ↘️↗️↗️ exits to Dark City.
If the EXP route has been followed correctly, you will reach Lvl 17 by this point.
Do not proceed if you have not reached this level yet, kill Dark Roots/Yellow Slimes to reach Lvl 17 or you will be unable to equip the ![]() Katana.
Katana.
Dark City (2)
Take the warp circle and unlock the ↗️ door.
In the room with Gusts, take the stairs, then proceed through the ↘️ exit.
In the next room, use ![]() Bat to fly through the window on the left, then keep using
Bat to fly through the window on the left, then keep using ![]() Mouse, go to the right (across the wood), then use
Mouse, go to the right (across the wood), then use ![]() Bat to fly through the last window.
Bat to fly through the last window.
Push the wooden block to open the path before proceeding through the ↗️ door.
Continue downstairs, ignore all enemies.
Refill life/energy before entering the boss fight.
Red Durathror
- 1st phase:
- Equip the
 Katana as the Dark Roots are spawning to react to where the bulb appears.
 - Hit the bulb ten times with Dark before it has a chance to attack.
- Equip the
- 2nd phase:
- Hit the correct bulb; look for the vibrating bulb, or you can use
 Bat to see which one it is.
 - Use Dark x3 once the bulb is opened.
- Hit the correct bulb; look for the vibrating bulb, or you can use
- 3rd phase:
- Hit once with no element, then once with Dark to end each cycle quickly.
- Hit her right as she spawns to cancel her attacks.
- Hit once with no element, then once with
- You should reach Lvl 18 after this fight.
Put all stat points into STRG; you should now be at 50 STRG/25 AGIL, which will increase your coffin-drag speed.
Drag the coffin and solve the puzzles.
After solving the puzzle with 2 wooden blocks, leave the coffin behind and walk onto the ↗️ staircase.
Use a ![]() Warp Leaf to leave the dungeon.
Warp Leaf to leave the dungeon.
Save the game and soft reset (A+B+Start+Select).
Set the system time to 2004/08/31 19:00.
The coffin is now in the piledriver screen.
Proceed through the southern ↖️ exit to go to the piledriver screen.
Do not enter the piledriver screen through the northern entrance or you will softlock the game.
Red Durathror Purification
Activate one generator and start the purification.
Enable max sunlight during the cutscene.
After regaining your powers, replace ![]() Mouse with
Mouse with ![]() Sol, then finish the purification.
Sol, then finish the purification.
Choose the second dialog option after the purification.
San Miguel (4)
Talk to Violet to trigger Nero, then go to Cheyenne’s shop.
Talk to him to get the ![]() Dash magic.
Dash magic.
Use this for movement whenever possible.
Equip ![]() Dash over
Dash over ![]() Bat.
Bat.
Go outside follow Nero.
Open this hidden chest for a ![]() Warp Leaf:
Warp Leaf:
You should now have three (3) ![]() Warp Leaves.
Warp Leaves.
Follow Nero through the ↖️ exit.
Use ![]() Dark to destroy the Dark Root in front of the Treasury (Enables Gust spawns on this screen for EXP grinding), then follow Nero and proceed through the ↖️ exit to the Aqueduct.
Dark to destroy the Dark Root in front of the Treasury (Enables Gust spawns on this screen for EXP grinding), then follow Nero and proceed through the ↖️ exit to the Aqueduct.
Aqueduct
Go inside the Aqueduct to receive ![]() Earth.
Earth.
Disable sunlight before leaving through the ↘️ exit.
Kill the first Gust outside Aqueduct with ![]() Sol, then use
Sol, then use ![]() Dark to destroy the ↗️ Dark Root and backtrack to Cathedral.
Dark to destroy the ↗️ Dark Root and backtrack to Cathedral.
Cathedral (2)
Proceed through the ↗️ exits.
Open the red chest near the main entrance for a ![]() Warp Leaf.
Warp Leaf.
Replace ![]() Sol with
Sol with ![]() Grow, then use it on the lily pad to proceed through the ↖️ exit.
Grow, then use it on the lily pad to proceed through the ↖️ exit.
Use ![]() Grow on the lily pads to reach a chest and get
Grow on the lily pads to reach a chest and get ![]() The Magician.
The Magician.
Use a ![]() Warp Leaf to leave.
Warp Leaf to leave.
Backtrack to Dark City, go through the piledriver screen on the way and kill all four Dark Roots with ![]() Dark to disable their respawns.
Dark to disable their respawns.
Dark City (3)
Take the warp circle and proceed through the ↗️ door.
Proceed to where you fought Durathror, then backtrack along the route you took the coffin through.
Once outside, proceed through the first entrance.
Element Puzzle
Equip ![]() Flame,
Flame, ![]() Frost,
Frost, ![]() Cloud and
Cloud and ![]() Earth.
Earth.
Use ![]() Flame on the bottom block.
Flame on the bottom block.
Push the iron block like this: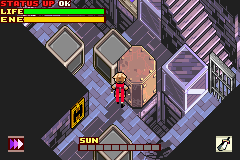
Use ![]() Earth to delete the floating block next to the iron block, then use sword and
Earth to delete the floating block next to the iron block, then use sword and ![]() Cloud to push the top block once ↘️.
Cloud to push the top block once ↘️.
Push the iron block in the hole.
Use ![]() Cloud to push the bottom block in these directions:
Cloud to push the bottom block in these directions: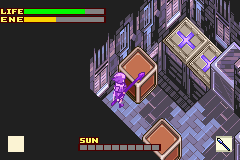
- ↖️ (sword)
- ↗️ (spear)
- ↖️ (spear)
- ↖️ (sword)
Now use ![]() Cloud on the other block:
Cloud on the other block: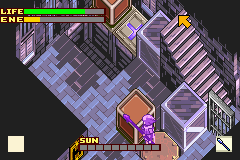
- ↘️ (sword)
- ↗️ (sword)
- ↖️ (spear)
Now use ![]() Cloud on both blocks:
Cloud on both blocks:
- ↗️ (spear)
Use spear and ![]() Frost to lower both blocks at once.
Frost to lower both blocks at once.
Use your remaining ![]() Solar Nut to refill energy.
Solar Nut to refill energy.
Equip ![]() Sol,
Sol, ![]() Mouse,
Mouse, ![]() Transform and
Transform and ![]() Dash, then proceed up the stairs.
Dash, then proceed up the stairs.
Use ![]() Sol to kill the Gusts before proceeding through the ↙️ exit.
Sol to kill the Gusts before proceeding through the ↙️ exit.
Go outside, then back into the room where you killed the Gusts (Required to enable spawns on a later screen).
Proceed back outside through the ↙️ exit, then proceed through the ↖️ exit after the narrow path.
Use ![]() Sol to kill the Gusts before using
Sol to kill the Gusts before using ![]() Mouse to go through the ↗️ mousehole.
Mouse to go through the ↗️ mousehole.
Open the chest to get ![]() The Hermit.
The Hermit.
During the cutscene, choose the first option:
Replace ![]() Sol with
Sol with ![]() Dark and
Dark and ![]() Mouse with
Mouse with ![]() Dynamite, then use a
Dynamite, then use a ![]() Warp Leaf to leave.
Warp Leaf to leave.
You should be Lvl 19 by this point.
Proceed through the ↙️ exit and backtrack to the Remains.
Remains (2)
In the Clay Golem room, proceed through the ↗️ exit, then the second ↖️ exit.
Proceed through the ↗️ exit (do not take the stairs).
Use ![]() Dynamite on the wall next to the Zombie on the top-left, then proceed.
Dynamite on the wall next to the Zombie on the top-left, then proceed.
Kill the Dark Root with ![]() Dark and open the chest to get
Dark and open the chest to get ![]() The Hierophant.
The Hierophant.
Replace ![]() Dynamite with
Dynamite with ![]() Sol, then use a
Sol, then use a ![]() Warp Leaf to leave.
Warp Leaf to leave.
Backtrack to San Miguel, then disable sunlight before proceeding through the ↖️ exit.
Kill the first Gust with ![]() Sol, then leave through the ↘️ exit to respawn it.
Sol, then leave through the ↘️ exit to respawn it.
Kill it two (2) more times, then proceed through the ↖️ exit into Aqueduct.
You should now be Lvl 20.
Aqueduct (2)
Open the door, then proceed.
Purple Slimes Trap
- Use Red Django, no element and sword.
Octopi Trap
- Equip Equip
 Cloth Armor.
 - Put all stat points into STRG.
- Replace Sol with Flame.
- Use Flame, after the fight refill life/energy on the skylight.
Skeleton Fencers Trap
- Use Black Django and Dark.
- Walk into the center of the room to cluster them, then kill all three at the same time.
- You should reach Lvl 21 after this fight.
Refill life/energy and put all stat points into STRG before entering the boss.
Blue Dvalinn
- Use Flame.
- Refill life/energy on the skylight as needed.
- When she charges you, time your hit so that it cancels her attack.
- You can hit the oil bullets with Flame to destroy them before they land.
- If she’s at 1 HP and far away, shoot her with
 Elefan coffin (Black Django and
  Sleeping).
 - You should reach Lvl 22 after this fight.
Put all stat points into STRG.
Replace ![]() Flame with
Flame with ![]() Earth.
Earth.
Use a ![]() Warp Leaf to leave, then backtrack to San Miguel.
Warp Leaf to leave, then backtrack to San Miguel.
San Miguel (5)
Go into the clockhouse and talk to the NPC.
Keep talking, then change the system time to 2004/09/30.
Go to Lita’s shop:
- Sell your entire inventory except for the
 Sunscreen and
  The Tower (塔) if you have it
 - Buy:
- 2
 Speed Nuts
 - 2
 Power Nuts
 - 1
 Warp Leaf
 - 8
 Solar Nuts
 - Fill the remaining inventory slots with
 Earthly Nuts
 - If you have The Tower (塔) in your inventory, leave one slot free for a
 Bearnut in Spiral Tower
- 2
Proceed to the piledriver screen.
Blue Dvalinn Purification
Activate all four generators and start the purification.
Use ![]() Earth during this purification, be careful of the bubble streams as they deal heavy damage.
Earth during this purification, be careful of the bubble streams as they deal heavy damage.
Proceed through the ↗️ exit, break the wooden block with hammer to continue.
Disable sunlight to open Sabata’s half of Spiral Tower.
Enable sunlight to open Django’s half of Spiral Tower.
Spiral Tower
Hug the top corner to avoid the Black Slime and take the stairs, then proceed through the ↘️ exit.
Slide along the wall over the narrow walkway (This is no slower than transforming) and push the block.
Backtrack and fall through the trapdoor on the left side of the room.
Use spear to hit the switch through the Black Slime.
Push the block and use the magic circle to switch to Sabata.
Use a ![]() Speed Nut as soon as you gain control.
Speed Nut as soon as you gain control.
Proceed upstairs, using ![]() Zero Shift to run through enemies.
Zero Shift to run through enemies.
On the way, step on the switch to open a gate for Django, then proceed.
Step on the switch outside, then use the magic circle to switch back to Django.
Upon gaining control of Django, hold Right on the D-pad WITHOUT using ![]() Dash, with the
Dash, with the ![]() Cloth Armor equipped you will consistently dodge the Black Slime.
Cloth Armor equipped you will consistently dodge the Black Slime.
Proceed upstairs twice, whilst opening the red chest by the second staircase for an ![]() Earthly Nut.
Earthly Nut.
Kill the first Cockatrice with ![]() Earth, then proceed upstairs.
Earth, then proceed upstairs.
Proceed through the ↘️ exit, then re-enter the room.
Knock on the upper pillar to attract all three Cockatrices, then kill them all with ![]() Earth to reach Lvl 23.
Earth to reach Lvl 23.
Proceed through the ↘️ exit and step on the switch to activate the elevator.
Stand on the elevator, then before it leaves the room:
 Transform into Black Django and select Dark.
- Replace
 Earth with Sol.
 - Put all stat points into STRG.
Sword+ Trap
- Use Black Django and Dark.
- Killing the Sword+ before it teleports is very difficult, but possible with accurate play.
- Use Transform immediately after getting the kill to switch to Red Django before the door opens.
- You should reach Lvl 24 after this fight.
Proceed through the ↖️ exit.
If you have ![]() The Tower (塔) in your inventory, use
The Tower (塔) in your inventory, use ![]() Mouse to go through the ↗️ mousehole and pick up a
Mouse to go through the ↗️ mousehole and pick up a ![]() Bearnut.
Bearnut.
Once outside, take the stairs and proceed ↗️ indoors.
Use ![]() Sol to kill the first Leys once you get indoors.
Sol to kill the first Leys once you get indoors.
Avoid the Stone Golems and proceed through the ↘️ exit, then activate the lever with spear and switch to Sabata.
Take the elevator, then use a ![]() Speed Nut before leaving the elevator.
Speed Nut before leaving the elevator.
Proceed upstairs at the bottom of the room.
Shoot the enemy outside (where Django is), then backtrack and take the other stairs.
Kill the Ghoul to get a key and open the door.
Before going outside, make sure you have some energy.
Once outside, shoot the lever and use the ↖️ magic circle to switch back to Django.
Proceed through the ↖️ exit.
Refill energy whilst taking the elevator, then proceed through the ↘️ exit.
Activate levers and switch characters during this puzzle to activate the brown lever.
During Sabata’s segments, fire a shot ↘️ from the magic circle to hit the lever and avoid movement.
Ensure that the floor has changed before switching back to Django after doing this.
As Django, hit the rusty lever with hammer, then push the block and backtrack inside.
Activate the lever to free Sabata.
Proceed through the ↖️ exit.
Put all stat points into STRG, then replace ![]() Sol with
Sol with ![]() Rising Sun and use it to skip the bomb puzzle.
Rising Sun and use it to skip the bomb puzzle.
Open the blue chest for a key, then proceed through the ↘️ door.
Take the stairs, then proceed through the ↘️ exit to go outside.
Taking the floating platform as Red Django is fastest, but is extremely dangerous, and a minor error will kill you.
Use ![]() Bat to avoid falling off the platform if not confident. If no armor is equipped, the flame jets will easily kill you.
Bat to avoid falling off the platform if not confident. If no armor is equipped, the flame jets will easily kill you.
Activate the switch, then backtrack inside and proceed upstairs.
Before using the magic circle, check the hint panel for the number and the kanji:
Use the magic circle to switch to Sabata.
Go back indoors, then proceed up the elevator on the south side of the room.
Sabata Block Puzzle
Use a ![]() Power Nut:
Power Nut:
After this, check the hint panel and switch back to Django:
Proceed through the gate and push the iron block based on the hint panels and the statue.
Note that Django and Sabata’s hint panels refer to each other’s blocks, inverting the solution as read.
For instance, 北2 東4 means North 4, East 2, NOT North 2, East 4.
北 = North, 南 = South, 東 = East, 酉 = West.
![]() Transform into Black Django before the final block push.
Transform into Black Django before the final block push.
Axe+ Trap
- Use Black Django and Dark.
- Do NOT hit the Axe+ more than twice before it gets close enough to use a regular attack, or you will trigger a dangerous attack that will likely instantly kill Django.
- Use Transform immediately after getting the kill to switch to Red Django before the cutscene plays.
- You should reach Lvl 25 after this fight.
Backtrack inside and proceed upstairs until you take an elevator.
The outdoors screen has solar wind that will push you if using sunlight.
Use the solar walkway with <=8 Sunlight to go straight to the next elevator.
Put all stat points into STRG, then equip ![]() Dash,
Dash, ![]() Sol,
Sol, ![]() Frost and
Frost and ![]() Cloud.
Cloud.
Use ![]() Sol to kill the first two Leys, then activate the lever.
Sol to kill the first two Leys, then activate the lever.
Kill the Leys again, then use a ![]() Power Nut.
Power Nut.
Refill energy to 100% before pushing the block, then proceed downstairs.
Push the left block ↘️↘️, then the other block ↙️↘️ so that they’re next to each other:
Push the floating block with spear and ![]() Cloud ↗️.
Cloud ↗️.
Break the top stone block so that you can push the bottom one to cross and reach the floating block again:
Push the floating block onto the switch with spear and ![]() Cloud, then use
Cloud, then use ![]() Frost.
Frost.
Replace ![]() Frost with
Frost with ![]() Rising Sun.
Rising Sun.
Proceed through the ↘️ exit.
As Sabata, proceed upstairs.![]() Zero Shift through the southern Black Slime and proceed upstairs.
Zero Shift through the southern Black Slime and proceed upstairs.
Shoot in the ↗️ direction to activate the final lever.
Backtrack downstairs and proceed through the ↖️ exit to reach Django.
If Django’s final puzzle was solved correctly, you should have at least 100 energy. Do not enter the boss fight without having at least this much.
During the dialog, choose the second dialog option to avoid a Game Over.
Black Dainn
- 1st phase:
- Use
 Rising Sun for a massive hit, then use two Solar Nuts to restore energy.
 - Stay away so that Sabata doesn’t get hit.
- When Dainn spawns dark orbs, destroy them with Sol.
- Don’t attack Dainn, instead, focus on good positions to avoid swords easily.
- When Dainn is stuck in the black hole, use Sol.
- Use
- 2nd phase:
- Use Sol to hit Dainn three times, then stand in this precise position to avoid his dark energy attack and keep attacking:
- Use
- Attack constantly to kill him before he goes underground.
- You should reach Lvl 27 after this fight.
Use a ![]() Warp Leaf to leave.
Warp Leaf to leave.
Save the game and soft-reset.
Change the system time to 2004/10/29 22:xx.
Backtrack ↙️ to the piledriver screen.
Black Dainn Purification
Activate all four generators with ![]() Sol and enable max sunlight.
Sol and enable max sunlight.
Use Red Django and ![]() Sol.
Sol.
Do not get hit by the dark orbs, they will one-shot you.
You will destroy them in two hits, so slash them down during downtime.
Skip the chest after finishing the purification.
Equip ![]() Dynamite,
Dynamite, ![]() Cloud,
Cloud, ![]() Dash and
Dash and ![]() Frost.
Frost.
Backtrack ↗️ to Spiral Tower.
Undead Zone B1
In the room on the ↖️ side, knock on the wall to lure the Skeletons, avoid being seen.
Proceed through the ↗️ exit, break the cacti to proceed.
Knock on the central pillar near the first Skeleton so that it looks in another direction, then proceed.
Skip the next puzzle by using ![]() Dynamite after entering the room.
Dynamite after entering the room.
In the next room, knock on the wall near the first Skeleton.
After the stairs, run in the ↘️ direction to avoid being seen.
B1 Block Puzzle
Refill life/energy to 100% on the skylight before leaving the room.
THIS IS THE FINAL SKYLIGHT AVAILABLE IN THE ROUTE.
In the next room, use <=8 sunlight to enable the solar walkway and proceed through the ↖️ exit.
Hit the Skeletons from behind and ![]() Dash during their damage animation so that they don’t see you.
Dash during their damage animation so that they don’t see you.
Replace ![]() Frost with
Frost with ![]() Transform and
Transform and ![]() Dynamite with
Dynamite with ![]() Bat.
Bat.
Use Black Django and ![]() Bat to fly over the traps and get the key, then
Bat to fly over the traps and get the key, then ![]() Transform back into Red Django and proceed through the door.
Transform back into Red Django and proceed through the door.
After entering the next room, knock on the wall directly in front of you to lure the Skeletons.
Have <=8 sunlight during the next room to enable the solar walkway.
Push the block and get the key, then backtrack to the first elevator (↘️).
Refill energy on the Solar Station and open the ↗️ door.
Sand Worm Trap
- Use
 Cloud on the head to stun it, then hit the head up to 9 times before running away.
 - Pray it doesn’t move onto your position and fire a rock whilst underground.
- Attack the body at least once after the tail starts attacking to ensure that it will dive at you after burrowing.
- Time an attack on the head as it dives at you to stun it again, then finish the fight.
- You should reach Lvl 29 after this fight.
If you have ![]() The Tower (塔), you can “skip” this fight by hitting the head 3-4 times, then using a
The Tower (塔), you can “skip” this fight by hitting the head 3-4 times, then using a ![]() Bearnut followed by
Bearnut followed by ![]() The Tower (塔) to instantly kill it.
The Tower (塔) to instantly kill it.
Open the blue chest for a ![]() key, then leave using the ↙️ elevator.
key, then leave using the ↙️ elevator.
Refill energy on the Solar Station, then unlock the ↙️ door and proceed.
Undead Zone B2
Equip ![]() Dash,
Dash, ![]() Flame,
Flame, ![]() Earth and
Earth and ![]() Dynamite.
Dynamite.
Put all stat points into STRG.
Proceed through the ↘️ exit.
Use ![]() Dynamite by the first torch.
Dynamite by the first torch.
Knock on the central wall to lure the Skeleton Fencer, then use ![]() Flame to light the other torches to open the gate.
Flame to light the other torches to open the gate.
In the third dark room, light the torches on the moving platforms with spear and ![]() Flame.
Flame.
Have <=8 sunlight to enable the solar walkways in the next room.
Break the wooden blocks and proceed through the ↗️ exit.
After the rooms with Skeletons, proceed up the stairs and refill energy on the Solar Station.
Lich Trap
- Be aware of your surroundings at all times.
- Use Earth and hit the Lich from behind.
- You can destroy the lightning balls with Earth.
- Avoid the summons and clouds.
- Use Solar Nuts to refill energy.
- You should reach Lvl 31 after this fight.
Open the blue chest for a ![]() key, then proceed through the ↙️ exit and take the elevator.
key, then proceed through the ↙️ exit and take the elevator.
Undead Zone B3
Proceed through the ↖️ exit and activate the lever.
Backtrack, then proceed through the ↙️↖️↖️ exits to activate another lever and spawn an ice block.
Proceed through the ↗️↘️↙️ exits.
Use ![]() Dynamite here (Turn sunlight down to a lower level to minimise damage taken), then use the first wall to slide onto this spot and get pushed by the Dynamite:
Dynamite here (Turn sunlight down to a lower level to minimise damage taken), then use the first wall to slide onto this spot and get pushed by the Dynamite:
Slide directly downwards, then towards the lever and activate it.
Proceed through the ↗️↘️ exits to backtrack to the first room.
Refill energy on the Solar Station, then proceed through the ↙️↙️ exits.
Slide ↙️↘️ on the ice, then wait a full second before sliding directly left in order to avoid hitting the Centipede.
Slide directly up onto the slope, then proceed through the ↖️ exit.
Proceed through the ↙️ gate, then use the plant to reach the next ↙️ exit.
Put all stat points into STRG before taking the platform.
Serpent Trap
- Use Flame and sword, you can hit the tail with precise hits.
- Use
 Dynamite whilst the Serpent is underwater to force it to jump at you.
 - Only aim for the head and tail.
- Break the bubbles to force it to jump at you.
- You should reach Lvl 33 after this fight.
Open the blue chest for a ![]() key, then take the new platform.
key, then take the new platform.
Use ![]() Flame if you have remaining energy to melt the ice block, then continue to backtrack to the first room and open the ↘️ door.
Flame if you have remaining energy to melt the ice block, then continue to backtrack to the first room and open the ↘️ door.
Undead Zone B4
Refill energy on the Solar Station, then proceed through the ↗️↘️ exits.
B4 Block Puzzle
Push the stone block and use ![]() Flame on the floating block.
Flame on the floating block.
Put all stat points into STRG. You should now be at 95 STRG.
Replace ![]() Flame with
Flame with ![]() Frost and
Frost and ![]() Dynamite with
Dynamite with ![]() Cloud.
Cloud.
Push the floating block with spear and ![]() Cloud ↗️↘️:
Cloud ↗️↘️: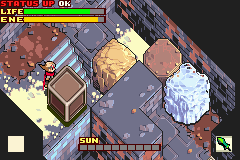
Break the stone block with ![]() Cloud and push the iron block ↘️.
Cloud and push the iron block ↘️.
Use ![]() Earth to delete the floating block.
Earth to delete the floating block.
Walk onto the switch.
Backtrack and proceed through the ↗️↘️↘️ exits.
Equip ![]() Frost,
Frost, ![]() Dash,
Dash, ![]() Transform and
Transform and ![]() Sleeping.
Sleeping.
Do not walk onto the platform, instead stand at the corner edge and use spear and ![]() Frost to extinguish the fire:
Frost to extinguish the fire:
Then use ![]() Sleeping and
Sleeping and ![]() Elefan coffin to shoot the lever.
Elefan coffin to shoot the lever.
Backtrack and proceed through the ↙️ exit.
Open this hidden chest on the way for a ![]() Solar Nut:
Solar Nut: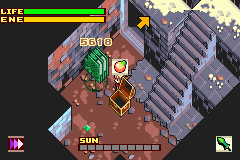
If life/energy are both low, this room is ideal for refilling by attacking the solar bamboo. Avoid absorbing dark bugs.
Proceed through the ↘️↘️ exits, then take the stairs.
Proceed through the ↙️↘️exits.
Take the floating platforms across the lava, open the right-hand red chest on the way for a ![]() Solar Nut.
Solar Nut.
Proceed through the ↖️↖️ exits.
Refill energy on the Solar Station.
Lich+ Trap
- Use
 Frost and hit the Lich+ from behind.
 - Once it begins its rotating attack, damage boost on its back and immediately let go of directional input to land in the correct spot to avoid getting hit.
- Use Solar Nuts to refill energy.
- You should reach Lvl 35 after this fight.
Use your remaining ![]() Solar Nuts and
Solar Nuts and ![]() Earthly Nuts to refill life/energy, then raise STRG to 99.
Earthly Nuts to refill life/energy, then raise STRG to 99.
You can put the remaining stat points into VIT if you want, but this is not faster.
Replace ![]() Sleeping with
Sleeping with ![]() Dark.
Dark.
Proceed through the ↖️ exit, then take the elevator.
Undead Zone B5
Take the single exits, this map is linear.
The room with the Centipede is dangerous if your life is low, but dying here will refill your life to 50% at relatively low time cost.
There is a solar walkway on the final screen, so have <=8 sunlight before entering.![]() Transform into Black Django and select
Transform into Black Django and select ![]() Dark before entering the final fight.
Dark before entering the final fight.
Jormungandr
- Open the menu immediately and use the Sunscreen to avoid taking damage from sunlight.
- You must have at least 1 sunlight during the entire fight.
- Use Black Django and Dark.
- Aim for the eyes until the tongue is out.
- During the first cycle, hit the body several times before attacking the tongue in order to get a more favourable second cycle.
- During the black breath attack, charge some energy and aim to hit the eyes close to the body to get a chance at hitting the tongue and body at the same time.
- During the second cycle, do not hit the body more than 4 times, or you will get a less favourable third cycle.
- Immediately attack the eyes as the third cycle begins, then aim to finish the fight here. At least several more attacks to the body will be required in order to kill whilst attacking the tongue.
During the cutscenes, enable max sunlight.
After the cutscenes, charge energy.
Time ends when Jormungandr’s life bar reaches zero during this final charge.